All too frequently I have customers who are not using a robust backup system, if it all. Your data is the one thing that can't be retrieved - once it's gone it's gone. Backup on the Mac is so easy all you need is an external drive, the MacOS takes care of the rest.
One thing you need to be aware of; iCloud (or Dropbox, or Google Drive etc) are not backup services, they are SYNCING services. They make sure that data is accessible across multiple devices. If you delete or corrupt a file on one then it gets synced to all of the rest.
Don't get caught out, back up today.
Backing Up with MacOS's Time Machine
In order to back up using MacOS you will need an external drive. My recommendation is to always get a drive that is larger in capacity then the internal drive, that way you will always have enough room to do a backup even if you have nearly used all of the capacity of the internal drive. You also need to make sure that the drive is formatted for Mac. If the one you purchase isn't it doesn't matter as it's possible to reformat the drive to the correct scheme.
Once you have your drive connected to the machine you will often find that the Mac will ask you if you want to use it for Time Machine backup. The simple answer is yes. The Mac will sort out all that it needs to and start the back up process.
When Time Machine is enabled every-time you connect your backup drive, Time Machine will take a look to see what has changed since you last backed up and then back up these changes. This means that the backup process will take longer to complete if you have not plugged the drive in for a while. If you are on a desktop I would recommend leaving the drive connected permanently. The computer will perform the check once every hour and back up what has changed. If you are on a laptop, I would plug it in at least once a day to make sure that you are never too far out if a failure occurs and you need to retrieve data from the backup.
Additional Time Machine Settings
If you wish to adjust the Time Machine settings you will find them in System Preferences>Time Machine.

Here you will find:
- A tick box which allows you to toggle the back up process on or off.
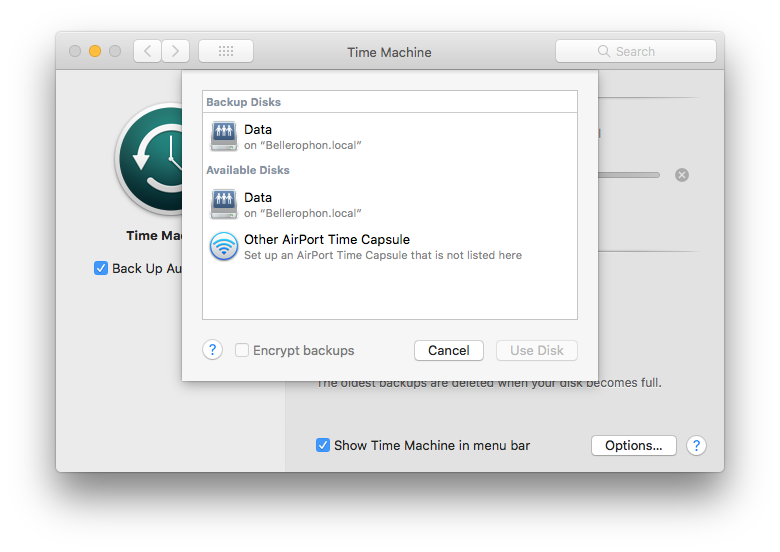
- A button which allows you to select which drive you wish to use for back up. This can be a drive connected to your machine, or a drive on the network such as a NAS or Time Capsule. You can configure Time Machine to use multiple drives for back up if you wish.
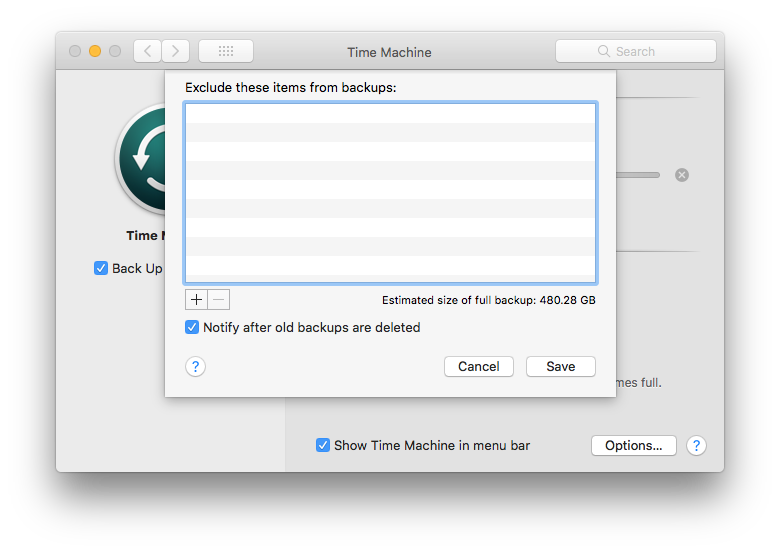
- A button labelled Options which allows you to configure exclusions and additions to the back up.
- A tick box that shows the Time Machine Widget in the menu bar.
The settings for the drive selection are pretty simple; a list of drives available on the system for use as a back up drive and an option to encrypt the backup data on the disk.

The Exclusions/Additions window available by clicking options has a list of everything that will be excluded from the back up. At the bottom of the list is a little + and - button. If you want to add an item to the exclusions list then click the + and navigate to the item. If you wish to remove something from the exclusions list (thereby including it in the backup) select it in the list and click the - button.

Adding External Drives to the Backup
By default external drives are added to the exclusions list. If you wish to include them in the back up then remove them from the exclusions list. Just remember to make sure you have enough space to include it on your back up drive. Again use the rule of thumb to make sure that you have at least the combined capacity of both the internal drive and an additional drive.
The menu bar widget gives you information about the current back up - Is it in progress, did it fail, when was the last complete backup. It also gives you the option to initiate a back up regardless of the schedule (Back Up Now) and the ability to browse the back up (Enter Time Machine).
Backing up the data on your computer can seem like a really scary proposition, but losing your data is an even scarier one. Back Up on MacOS is super easy, so don't delay, get that back up running.

